


The day has come. A hundred artist voices cry out in pain... and are suddenly silenced by the beginning of a zoom call. It is the best of times, and the worst of times. It is industry review.
For this month's review I decided to push the cannon as far as possible and present that. My intent with it was to make an environmental piece with light narrative elements, but also to introduce some technical aspects to better serve my personal workflow.
To begin, I had some issues with my scene's layout. The intent was to have a sandy set of dunes spill over some ruins where our protagonist cannon would lay, weathering and eroding. However, unless I was prepared to pump a ton of polygons into getting a proper shape and smooth curvature, I wasn't going to get the look I desired. The picture below shows exactly what I mean, that the holes left for the brick to peek through were simply not believable.

And oh yes, I made some brick and a sand texture. I'm sorry for not explaining, it's been a long week. The brick was actually the easier of the two- take a plane in Maya, extrude it into a pattern, sculpt in Zbrush, and bake normals in Substance while messing with color and grunge, etc. The brick you see before you is literally a single polygon. Such is the power of baking.
The sand was a lot more complicated and took me a while to understand, much less implement. I was using Substance Designer to make it, see, because I didn't want to hand paint the whole diorama like some maniac. No, instead I created a tileable texture and slapped in on this simple geometry... but now we're back to the issue. I had thought fine, perhaps we don't need to make it curved or smooth or whatever if it'll blend well. Another issue with this, and perhaps the most glaring one so bully me for not immediately pointing it out, is that the sand just stops. It doesn't flow, doesn't scatter, it's like someone was painting orange with a brush and just stopped there.

The thing about this predicament is that I did not have the time to figure out how to make vertex painting or some other solution in Unreal. I tried dithering, like in the picture above, but it looked terrible so it was back to Substance for me. The issue is that the bricks and the sand were part of different meshes, so even if I painted some opacity on the sand and made it look all good in Painter, it wouldn't have been translated in Unreal. So in the end I decided how about we just don't worry about the meshes, and instead I made it all one mesh. What this allowed me to do was use black and white masks to tease out the underlying brick, brush away the sand, and just make something that looks like it was made in post-ps2 America instead of before it.
Creating materials in Substance Designer was a lot of work for someone who had never used the program until a week ago, but it was ultimately very rewarding and as you can see, gave me the opportunity to fine tune my environment as I pleased.


Here are the materials I made, as well as their node graphs. The sand was pretty easy to make, but the brick took me a while as it was actually a set of textures from Painter that I then worked in Designer to plug back in Painter as a smart material. With these two, I could make any sort of desert ruins landscape and customize it as I pleased. Of course, there are easier ways to do this and ultimately vertex painting in Unreal would've been the optimal choice, but for this instance and in situations where your project isn't using Unreal, this method is a viable alternative.
Ah yes. Before I forget. This is what the piece actually ended up looking like. I hope you enjoyed my ramblings as much as I enjoyed getting the grade for this blog post!


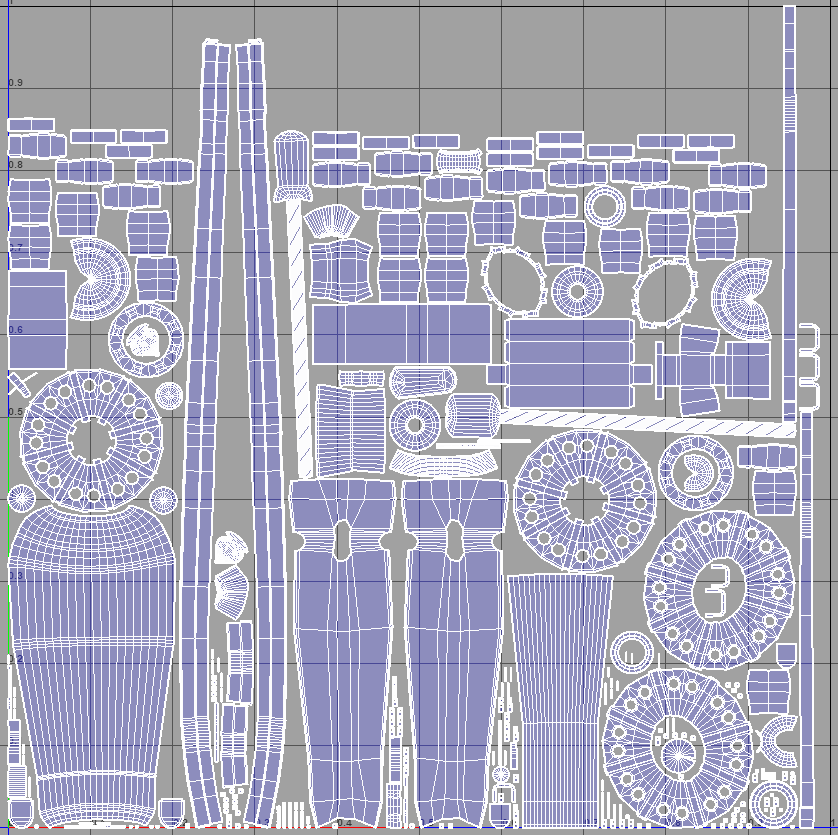
It's been a while since I posted, but I've been catching up on my assignments and learning as I go to make a comeback. Right now I'm behind on putting the finishing touches on the cannon but this is a process that cannot be rushed and to which shortcuts don't exist- sculpting, baking, texturing, there is no easy way to do it.
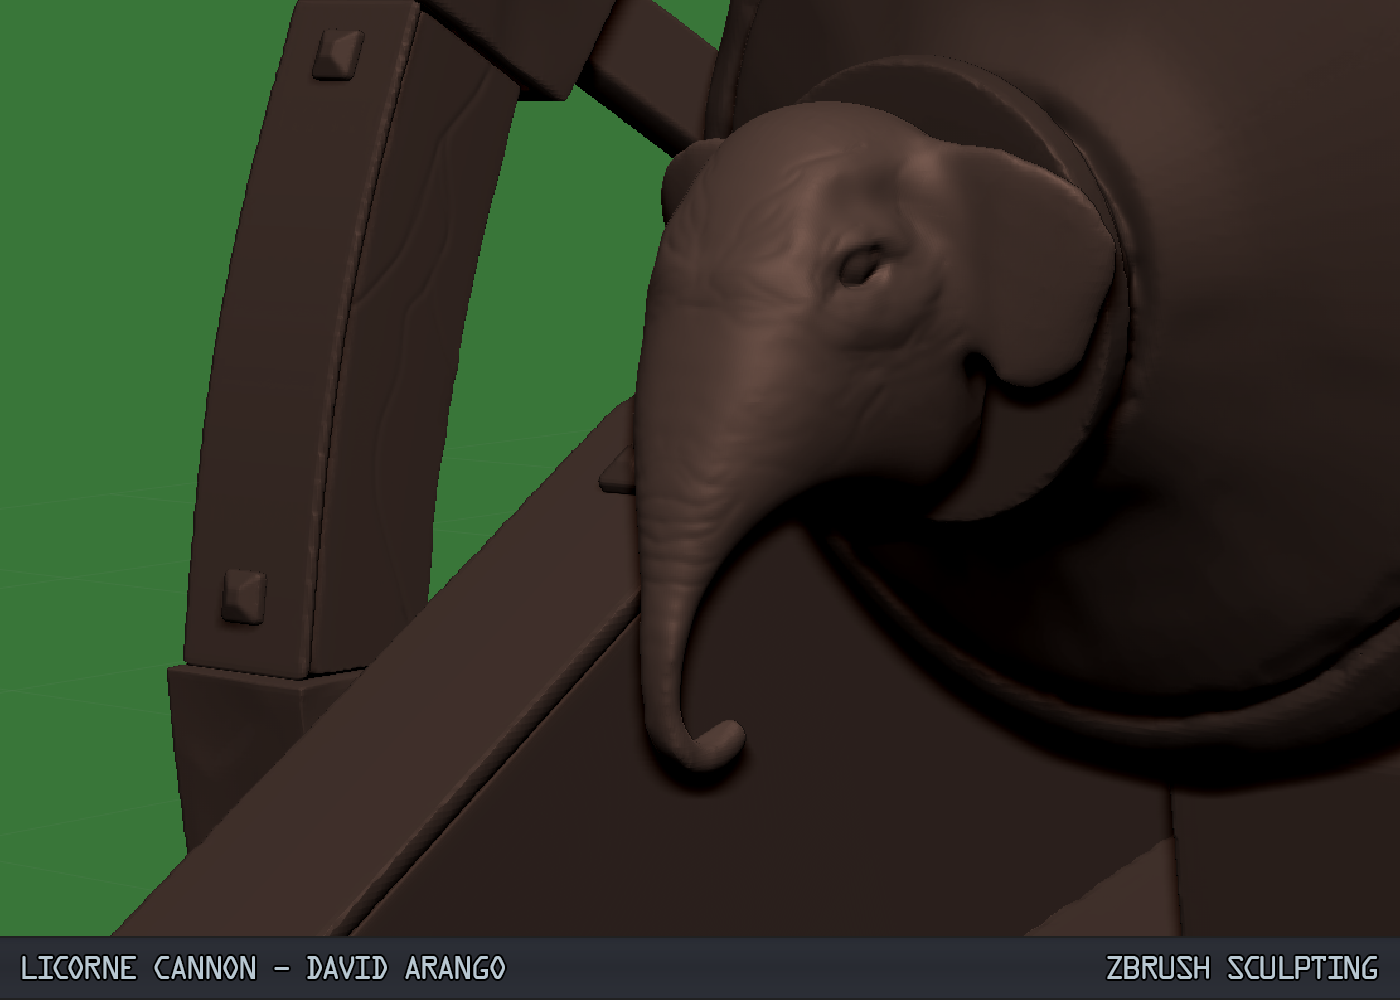
I took inspiration from an Ottoman Grand Bombard for this design (my third redesign of the cannon). I suppose I didn't feel strongly about the previous iterations and I couldn't find a style that would work to show off the sculpting I wanted to, so I settled on this. The Arabic accents and desert setting give the cannon both a recognizable aesthetic but also character since it is perfectly reasonable that the desert head and sands would erode the cannon to the point you see below.

Here is a shot of the game res cannon, before UVing. It stands at 4800 polygons and has some smoothed edges so the baking information can come through easier.

This is a shot of the high res version, standing at god knows how many polygons. I wanted to practice various techniques and methods while sculpting, with varied degrees of success.


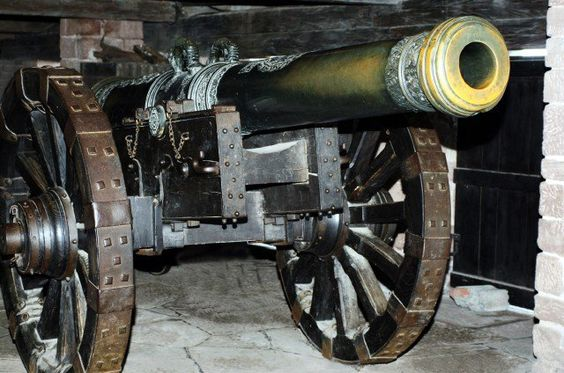
For this week I decided to change things around and restart my project on the right footing. After fixing some of the issues I mentioned in my previous post, I did more research on the kind of cannon I was going for and realized that another kind would fit that better. The Gribeauval cannons are lightweight and compact, but are also very generic since they were standardized during the Napoleonic era. I found a type of mortar, the Russian Licorne, and this proved to have the bigger bore and stockier features I was looking for.


Without further ado, here are my progress pictures!


-Eventually I would like to be a Creative Director.
-First we need to get in a studio: employment in an established studio.
-Currently I would like to explore being a 3D environmental artist
-I want to investigate interior spaces as an environmental artists
EXTRA STUDIES:
-Concepts and modularity
-Trim sheets
-General architectural stuff (window, door heights, asset types and styles, etc)
-Top artists that I respect (top 10)
-Start a conversation with them
-
This week we prepped the model to go into Zbrush. What we needed to do with our low poly mesh is use techniques such as beveling and fencing to get the edges just right. Here are a few pictures of my progress.


Boot camp is over, and our first assignment is to make a cannon with very detailed surfaces and materials. Nick gave us a cannon tutorial he made, but allowed us to push the cannon as far as we wish so long as we complete it. Given that this is a learning exercise, I decided not to go too wild with it and instead base my research on a realistic design.
I'm a big fan of the Napoleonic era and the artillery used during that time period was iconic for its lightweight designs that didn't sacrifice firepower. The French used a new Gribeauval system for cannon classification; this standardized the cannons in an efficient way and helped the French armies achieve the victories they did.


Here are some references of a 12 pounder cannon. I intend on reproducing it closely while adding some flair and details to give it character.


I also intend on making the piece part of a diorama set in the French countryside, and this will involve vegetation and miscellaneous items. However, for this week I decided to focus more on the cannon itself than the peripheral geometry. As such, I began modeling just the 12 pounder.


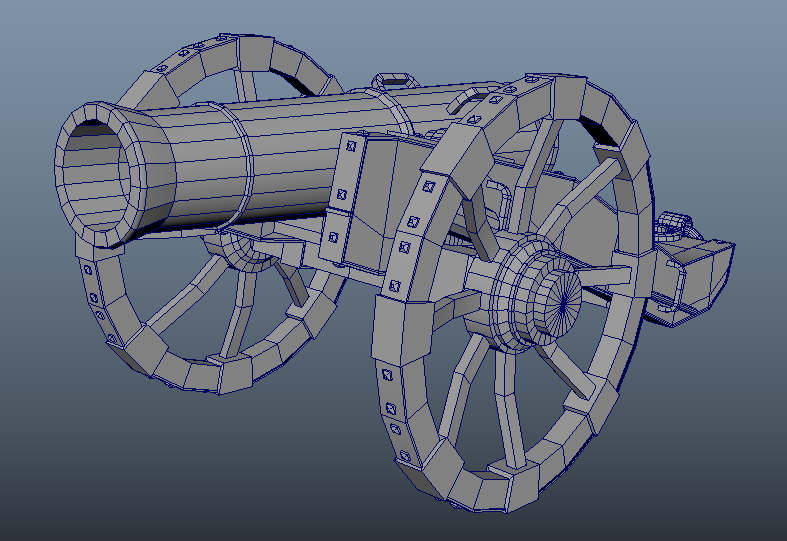


I modeled everything in pieces, which allowed me greater freedom when modeling and decorating. I snapped axes to the center point and around the axles to pose the cannon once the overall body and details were done to avoid modeling at an awkward angle.


Finally, this is the end result in Unreal 4! Next week I'll add more detail and surrounding objects!


