Labels

Monday, September 28, 2020

Portable ATM (3D Art Week 05)

 This week we begin our slow descent into complex modeling and all the wonderful complications that brings. For our first try, we were tasked with making a crate, or crate-like object, and utilize the production pipeline we'd been taught. As such, my first step was (besides getting a reference!) to find a proper scale and begin from there. I decided to go with something sci-fi and slightly complex, and this design called out to me because of the big hologram on top. This reference image shows a medkit of sorts, but I imagined my crate to have a dollar sign instead of a cross- a box that bestows cold hard cash to whoever finds it!


Here we see the scale reference I used- the Unreal 4 dummy. The box barely goes up to his knees, which means it has roughly the size of any regular crate found in videogames. This also makes it very easy to stack- just turn off the hologram first!

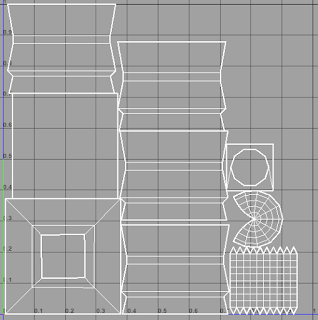
I started with a very basic shape to outline the limits of the mesh. Once this was done, I made a hasty UV so Unreal's lights wouldn't freak out, and then exported my quick proxy shape to the game engine. I walked the dummy over to the box for a size comparison.


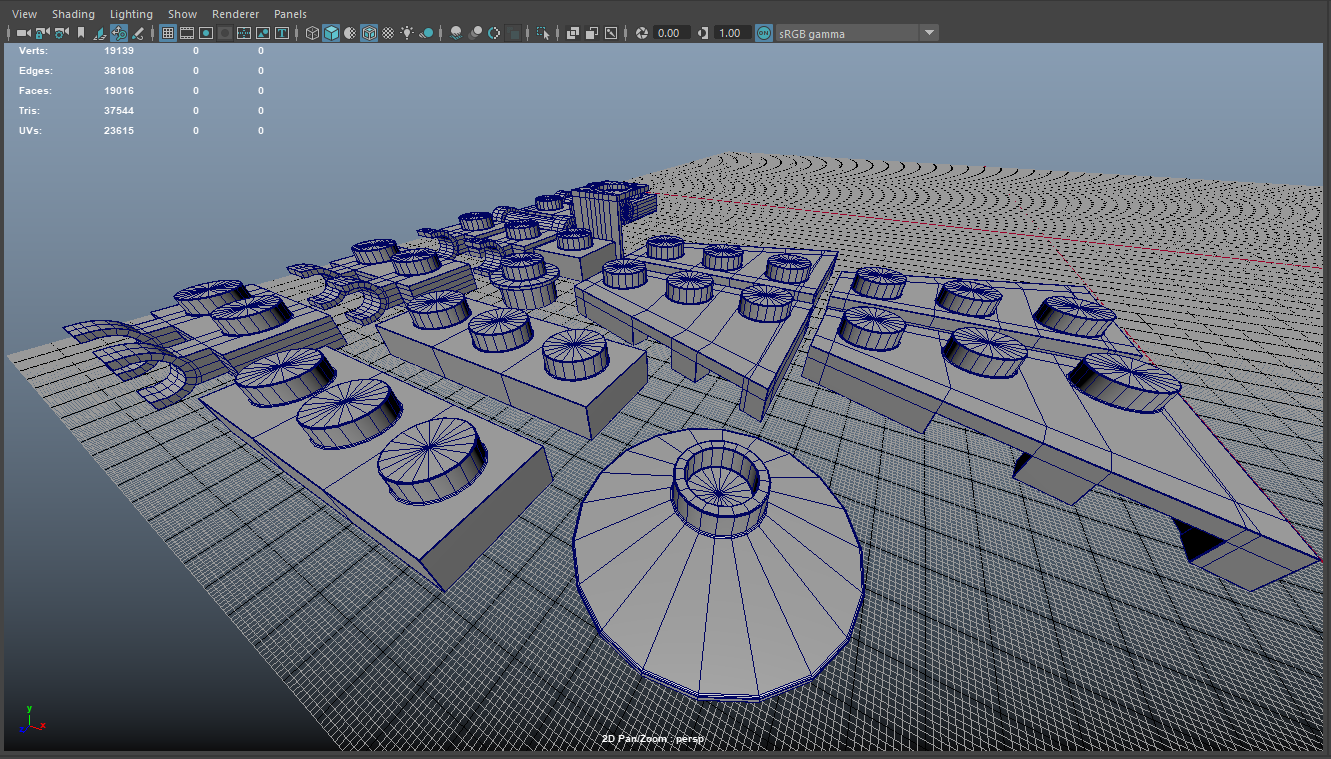
Once the pipeline was established, it was then time to finish modeling out the rough details of the crate. I used some booleans for the sides and fixed the topology issues they brought, and then used the extrude tool liberally to carve the shape out of the mesh. Once I was satisfied with the rough shape of the box, I reimported it back to Unreal and added some lighting to show off the surface! Next week I'll add in some final detailing and textures, along with an actual hologram instead of just a transparent orb.


Thursday, September 24, 2020

High Quality Aesthetic Aliens (Common Art Week 04)

 This week we were tasked with rendering a high quality shot of two subjects, an alien and our previously created Lego set. We're using Arnold renderer and doing further post-processing in Photoshop, so there is great freedom in what we might be able to do and a huge variety of techniques and settings to choose from. 

To begin with, we had to build a basic 3 point lighting setup. I used an AI Area Light for my main light, with a wide scale for soft shadows. This is the primary source of lighting and shadows and thus has a good amount of intensity. My bounce light was an AI Sky Dome Light with an HDRI added, and my rim light was a Maya point light with the intensity turned all the way up after setting it to Quadratic decay.

Here are some examples of the material nodes and the settings used for the alien.


After rendering with some minor settings tweaked, I took these files (as EXRs!) to Photoshop for some heavy editing. The image on the left is where I started. In the end I decided to lean towards a colored pencil filter and then tweaking the results from there to give the image a very hot palette of colors. The alien went from having an almost patina-like skin tone to a healthy copper sheen that wouldn't be amiss in a desert world. I enjoyed these colors a lot more, so after some more experimenting I exported and moved on to the TIE fighter. 


The TIE was a lot more straightforward and easy to figure out than the possibility-filled alien bust. I had previously used a purple/blue color scheme in my TIE renders, so I sought to do the same here. After applying a palette knife filter, I messed with some saturation and contrast settings to give the TIE a robust, colorful appearance. 

Monday, September 21, 2020

For the Glory of the Empire, Part 2 (3D Art Week 04)

 Last week I wrote about the fantastic TIE Interceptor. Modeling it didn't take too long and was very entertaining, so I decided to continue making these micro fighters with more and more pieces added to my virtual collection. The brilliant part about working with modular pieces like Legos is that once you have one, you can easily make the rest!


My next build was the humble TIE/LN, the workhorse of the Empire. It has all the disadvantages of the TIE Interceptor and none of the benefits, so to compensate for being such an individually weak fighter, it attacks in massive droves to overwhelm enemies. As a final build, I chose the iconic Y-Wing bomber, this time a Rebel Alliance ship. The challenge was to build a new thing with the pieces from the first week's set, but I couldn't help myself and made a cheese wedge brick to serve as the nose and cockpit of the craft. Fun fact, these bombers were actually used extensively in the Clone War, and the reason why the Rebellion's version is so damaged is simple wear and tear over the years- and the fact that most of their ships are salvaged from Imperial junkyards. 

With modeling out of the way, I decided to use Unreal 4 to frame my shots and deal with postprocessing. The first step was to make a blueprint for each ship, that way updating the topology or adding detail down the line would not only be easy, it would do so automatically. 


Once every ship was built, I put them in the scene and posed them for post-processing. Materials were generated and instanced, that way every single one would have the same values and parameters to simulate plastic Legos. 

I experimented a lot here, and even hooked up a custom texture to make the TIE cockpits thanks to my efforts UVing these bricks earlier. Specularity was added to the Y-Wing's thrusters to simulate the superhot plasma discharge, and then it was time for lighting! My setup was very basic. A spotlight to grant shadows and focus. A directional light to provide fill. And finally, an assortment of point lights to handle any residual or peripheral lighting (thrusters, TIE laser beams). 

It was a lot of fun to mess around with these settings, especially post processing. Dirt masks were added to give the piece that extra oomph, and after messing around with more materials and a low fog to get rid of any discernible or distracting background, I was ready. 

Camerawork using Unreal's sequencer was a challenge to understand for sure, so I decided to leave my camera static and focus on the ship movement to attract visual interest. A blueprint was generated for each ship, and a rotating value was given to each, thusly making them spin around as if in a cake shot. 

After some minor tinkering in Photoshop, the piece was ready! Take a look at the finals renders below to see diorama I created using these pieces and each individual ship type for a closer look, or check out the embedded video under that to see my Star Wars tribute in action. I hope you enjoyed looking at my project as much as I enjoyed making it!


Thursday, September 17, 2020

Vaporwave Truck (Common Art Week 03)

 This week's assignment was to use value and color to create separation on objects and highlight prominent features easier. I chose a classic vaporwave aesthetic for the color pop and their complimentary nature, which allowed me to mix the palette on the piece very easily. Here are some references for what I had intended:


Here are some progress pictures of the painting process:


Special attention was given to the door and whatever might be lying within. Warm colors were used to form a contrast against the cool vaporwave palette. This stark difference was intended to draw the eye there and keep the audience wondering what is inside the vehicle and what the purpose is.


Sunday, September 13, 2020

For the Glory of the Empire, Part 1 (3D Art Week 03)

I've mentioned my taste for TIE fighters in a previous post, so when an assignment came to make a Lego set in Maya, I knew what I must do. TIE fighters are a versatile and economical design that actually has more variations than the regular TIE/LN and TIE Advanced we most often see. In fact, today I bring you a little nugget of Imperial joy in the form of the powerful TIE Interceptor: a predator of a ship with four ion cannons, dagger-shaped solar arrays, and an engine turbocharged to give it a legendary top speed. It most definitely needs all these advantages, as without a hyperdrive nor shield generators it's very vulnerable without support or an ace pilot behind the controls. This model was seen harrying Rebel scum in Episode 6 at the pivotal Battle of Endor!

I found a neat Interceptor design in a 2016 advent calendar by Lego. With my instructions ready, I began work on the Interceptor as it always begins: with a cube. Simple measurements and dimensions were paramount to the process since without them, the whole operation fails. Scale has a double importance in the Lego realm, as every brick is perfectly measured and has a proportionate relationship with each other. 

For specialty pieces like this 1x1 plate with a horizontal U clip, a lot of measuring had to go into it as well as using real life pieces to figure out the correct ratios. You can see more of the same with the rest of the pieces that follow. 

In the end, I finished work with a neat little array of Legos that made me reminisce about when I would open a box of Legos and look in wonder at the pieces inside. Next week, I'll assemble them!


Friday, September 11, 2020

Praxis Consortium Ships (Common Art Week 02)

Star Wars has been a massive influence in my life and art. Actually, one of my earliest memories is of Luke Skywalker losing his hand to Vader in Bespin. So when this week's assignment tasked us with designing starships, I knew exactly where to turn for inspiration. 

TIE fighters have to be one of the most iconic starships in the creative universe, and it's all because of their orb-like cockpit. I took some inspiration from that while I was modeling, and quickly developed my design to make it stockier and more modular for brainstorming.

One of the things I've always liked is comparing ships to insects, and so this was a source of direction in this project. Forward stabilizing fins emulate beetle mandibles. Wings resemble expanded shells. Angular lines, spikes, a certain lethality to each ship. 

In the end, I came up with these nine designs. I wish I had more time to work on them and perhaps I will revisit this at a later date, but for now it remains a fun project that challenged my ability to get creative. I hope you enjoyed my work!

Saint Anatoles Cathedral (3D Art Week 03)