Labels

Monday, November 9, 2020

Russian Licorne Cannon (3D Art Week 10)

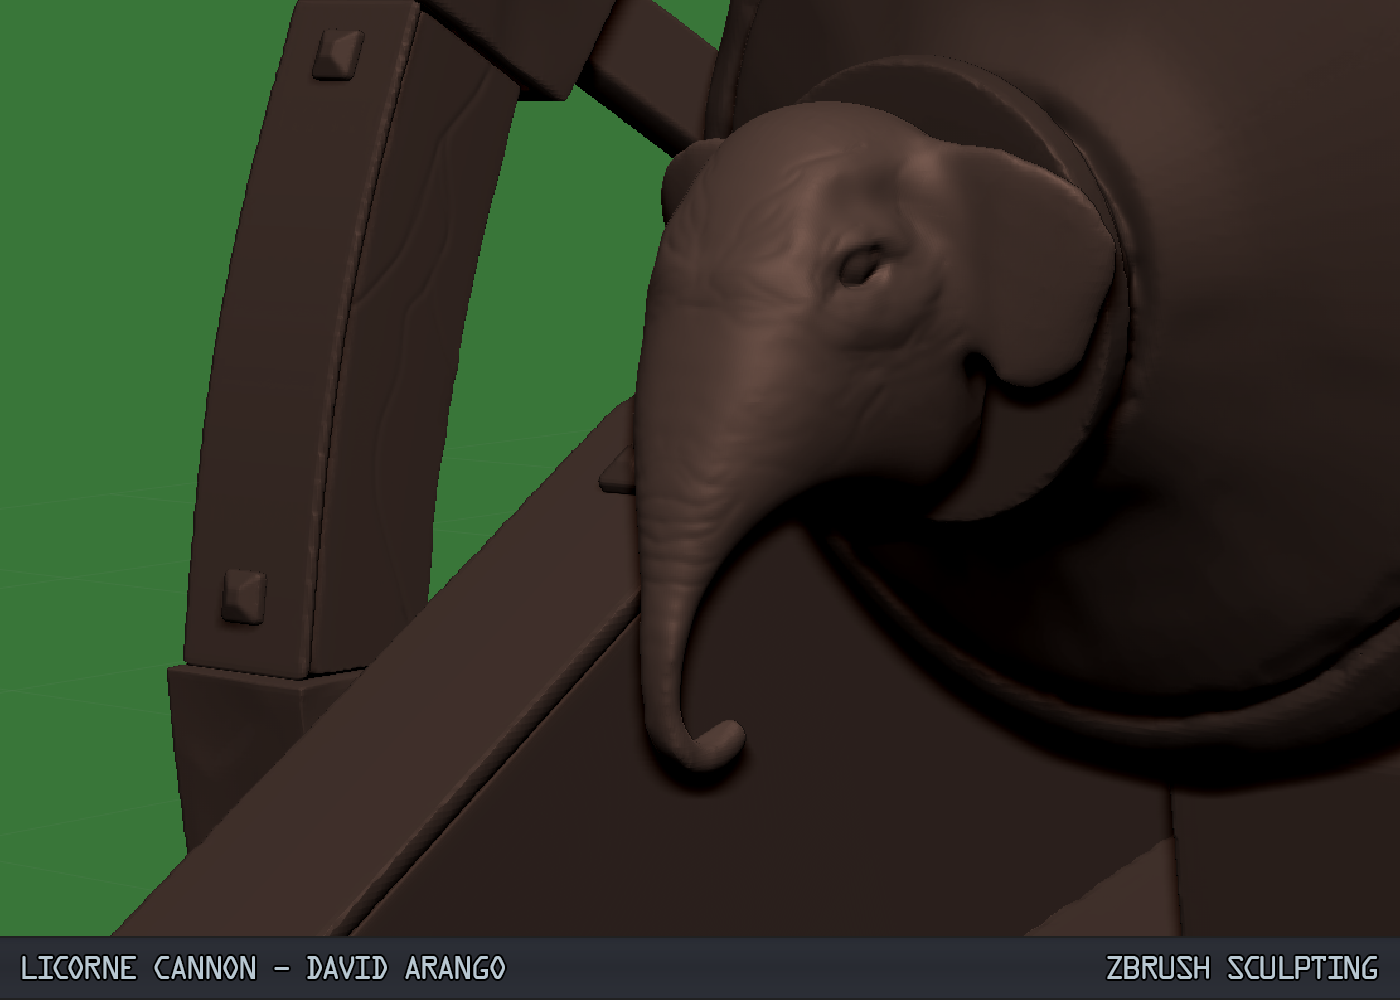
For this week I decided to change things around and restart my project on the right footing. After fixing some of the issues I mentioned in my previous post, I did more research on the kind of cannon I was going for and realized that another kind would fit that better. The Gribeauval cannons are lightweight and compact, but are also very generic since they were standardized during the Napoleonic era. I found a type of mortar, the Russian Licorne, and this proved to have the bigger bore and stockier features I was looking for. 


Without further ado, here are my progress pictures!


Tuesday, November 3, 2020

Goals

-Eventually I would like to be a Creative Director. 

-First we need to get in a studio: employment in an established studio. 

-Currently I would like to explore being a 3D environmental artist

-I want to investigate interior spaces as an environmental artists

EXTRA STUDIES:

-Concepts and modularity

-Trim sheets

-General architectural stuff (window, door heights, asset types and styles, etc)

-Top artists that I respect (top 10)

-Start a conversation with them

-

Monday, November 2, 2020

Gribeauval 12 Pounder Cannon (3D Art Week 09)

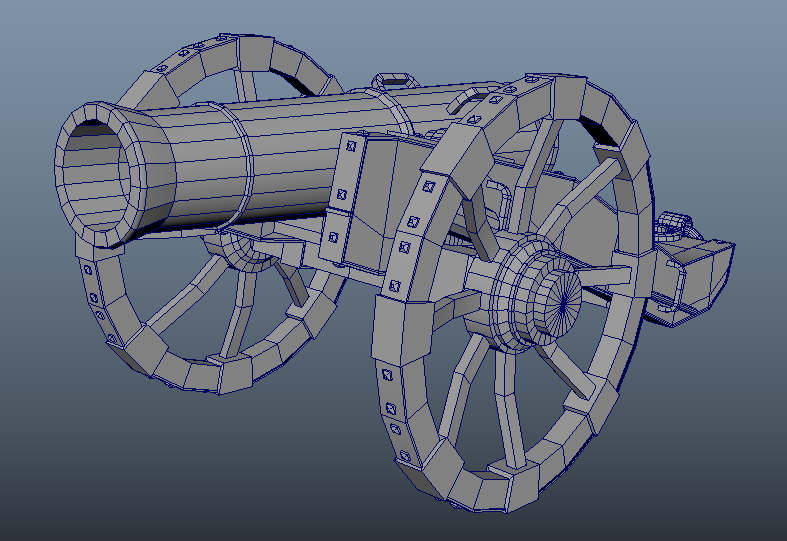
 This week we prepped the model to go into Zbrush. What we needed to do with our low poly mesh is use techniques such as beveling and fencing to get the edges just right. Here are a few pictures of my progress. 


Low Res


High Res


And the imported model in ZBrush

I ran into some issues while converting the pieces into Dynamesh, but the fixes were simple enough. From ngons and bad topology in need of fixing, to open mesh pieces that needed to be closed off. 


For example, here is the cannon bracing that I would have around the wooden carriage. To economize on topology, I deleted the bottom faces since the body would be right under them. What this led to in Zbrush, however, is that the open mesh was closed off by the algorithm as best as it could, leading to topology in unwanted areas. If I were to continue sculpting using this mesh, I would have interpenetrating geometry as soon as I combined all these pieces together, and that's simply not convenient. 

As a result, the fix was to close off that part of the mesh. The cannon would have a handful more polygons, but it would avoid the nastiness of interpenetration. 


Another issue I had was edge flow and how the topology looks after uprezzing. However, it doesn't seem like it would be an issue because everything will be baked afterwards, and the true model will have clean and minimalist topology. 


Likewise, the UVs aren't exceptional and were actually made with automatic means. The high resolution model simply needs to have functional UVs for it to display properly in ZBrush. As such, this has been a learning process not only with the process and how it functions, but as well as the presentation of these details to properly show off my thought process. I tend to like to ask many questions and figure out whatever I'm doing thoroughly, so this process was good for my learning style. 


Thursday, October 22, 2020

Gribeauval 12 Pounder Cannon (3D Art Week 08)

 Boot camp is over, and our first assignment is to make a cannon with very detailed surfaces and materials. Nick gave us a cannon tutorial he made, but allowed us to push the cannon as far as we wish so long as we complete it. Given that this is a learning exercise, I decided not to go too wild with it and instead base my research on a realistic design. 

I'm a big fan of the Napoleonic era and the artillery used during that time period was iconic for its lightweight designs that didn't sacrifice firepower. The French used a new Gribeauval system for cannon classification; this standardized the cannons in an efficient way and helped the French armies achieve the victories they did. 
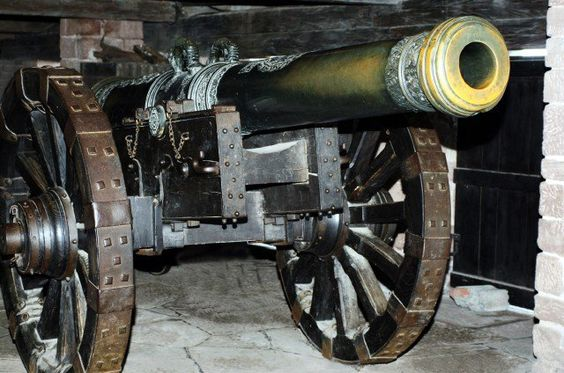

Here are some references of a 12 pounder cannon. I intend on reproducing it closely while adding some flair and details to give it character.


I also intend on making the piece part of a diorama set in the French countryside, and this will involve vegetation and miscellaneous items. However, for this week I decided to focus more on the cannon itself than the peripheral geometry. As such, I began modeling just the 12 pounder. 


I modeled everything in pieces, which allowed me greater freedom when modeling and decorating. I snapped axes to the center point and around the axles to pose the cannon once the overall body and details were done to avoid modeling at an awkward angle. 

Finally, this is the end result in Unreal 4! Next week I'll add more detail and surrounding objects!

Thursday, October 15, 2020

The Creation of Kong (Common Art Week 07)

 Our final assignment before we are free of boot camp! Nick was very kind as to allow us almost no parameters or restrictions- anything is fair game and we're able to use anything and everything we've learned in Common art. 

I rather enjoyed the freedom nature of the assignment, and as such I had a wide gamut of choice. I wanted to once again put my own spin on a piece of recognizable art, so instead of creating my own concept [t with limited time, I chose the Creation of Adam by Michelangelo.

Easily the most fun art of this week's assignment was posing all these animals and Hugh to get them in the right place. Upon rendering it, I took it to Photoshop where I came up with a a post processing to-do list. 

This is the final piece! I hope you like it!

Monday, October 12, 2020

Portable ATM, Part 3 (3D Art Week 07)

Our final week with this crate has finally come! 


Before showing you guys the end result, let's take a moment to review the reference once again. I found this on Pinterest and it seemed like a good, complex shape to mess around with, so it became the focus of the project!


For this week, after modeling and baking normal maps, we were tasked with texturing the crate. Substance Painter was an absolute joy to use: the controls were intuitive and a popup appeared with shortcut reminders, so getting around was easy. The tools were powerful and making full textures was no issue at all!


Here is the final render for these crates. Quite a lot went into the post-processing, from a dirt mask colored the same tint as the interior lights of the crates to some light chromatic aberrations and fog in the background to sap light and definition away from any possible distractions. 

Unreal 4's sequencer is pretty robust and allowed for a wide range of effects on any operable cameras. I opted for a simple fade in and out, but the possibilities are very wide for displaying work in a professional capacity. I hope you like the final product, it's been a productive three weeks and I enjoyed sharing them with you!

Thursday, October 8, 2020

Medellin Street Corner

Medellin is a city in the country of Colombia, the place where I was born.  I actually come from Bogota, which means I have to have a friendly rivalry with anybody from Antioquia. However, not even the most diehard patriot will turn a blind eye to the beauty of Medellin's city, and of the tenacity that her people have demonstrated in revitalizing the slums into the tourist attractions they are today. As such, this week's assignment was my perfect opportunity to render tribute to this city and just have fun exploring Colombia again.


We were tasked with making multiple point perspective shots in a city, which led me to immediately think of Medellin's Comuna 13- a neighborhood known for being the most dangerous place in the entire city. Over time, a citizen outreach and revitalization program turned the place around and it's become something of an art capital in Antioquia. The buildings there are all squat and boxy, which is perfect for showing off perspective. Another thing that I found fun was that Medellin, and Colombia as a whole, is very hilly and as such our cities have a sort of verticality that gives them a distinct personality, and for the sake of this assignment it gives me an opportunity to make a visually appealing piece. 


Planning out the piece took me a while. I grabbed as many reference pictures as I could, and sifted through them to get the look and feel of these buildings down. I wasn't going to be able to be faithful to the architecture, but I wanted to capture at least some semblance of the style.


A chaotic street corner, packed with a mixture of dwellings and stores, seemed to me like the best route to take this. This seemed to me to display the quintessential quality of a city- everything is at your fingertips, everything is stacked and mushed together, and buildings go tall instead of wide. 


Once I had a basic layout in mind, beginning in Maya was very easy. Having an outline planned out made blocking out the buildings simple, and I was able to focus on things like scale, building diversity, and how well everything would fit with each other.

Once everything was blocked out, I began to model each building separate from the layout. The intent was to have the building in a position to make modeling and assembly easy, and then rotate and translate them as they needed when that step was done. 

I developed a modular asset system where I would take a building and outfit it with any decoration and trimming it needed as well as model it to better suit the environment. 


Finally, I began to render out the passes. 1 point perspective, 2 point perspective, and 3 point. Our final task was to take one of these and push it farther, so I chose the 2 point perspective and took it to photoshop. 


This was the final step in the little corner's journey to this blog. I chose a film noir look for this shot because to me, these buildings feel old and bring me nostalgic feelings. Seeing them again through film grain as if it were a black and white picture was evocative to me, and I hope pleasing to you. Thank you for reading!


Saint Anatoles Cathedral (3D Art Week 03)